Friday, June 13, 2008

:::Dusk:::


:::Dusk:::
Dusk was written by Aiya Riordan on June 4, 2008. Any similarity is purely coincidental.

Supplies
(1) Frame of Choice
(1) Image
(2) Papers of Choice
(1) Ribbon of Choice
(1 - 3)Doodle
(1 – 3) Flowers or Embellishments of choice.
Mask of Choice

My Supplies
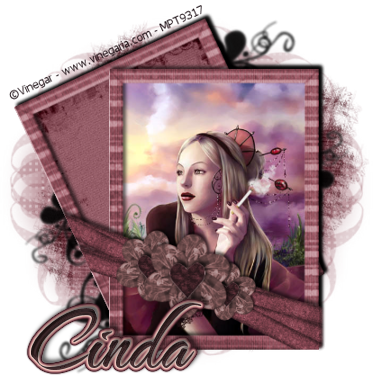
Image by Vinegar. You need a license to use her work. You can get one at http://www.mypsptubes.com/
Scrap kit “Elegance” by Sophisticated Simone.
Masks by Chelle. #167 & 17.

Instructions
Open a 450x450 Image.
Paste your frame as a new layer twice so that you have two of the same frame.
Highlight the lower frame layer and paste your image as a new layer. Resize and place under the top frame as desired.
Give the shadow of choice to your top frame and merge to your image.
Highlight your bottom layer and paste your paper of choice. Resize as desired. Give your bottom frame the shadow of choice and merge to your paper. Now skew your framed paper so that it’s slightly offset of your framed image.
Highlight your bottom layer and paste your doodle as new layer. Resize and place as desired. I used 1 doodle and used it several times in different sizes and placements. Merge these doodles together.
Highlight bottom layer and paste 2nd paper as a new layer. Apply mask of choice. I used Chelle’s WSL_Mask 167. Floodfill your bottom layer with a color from your image and apply your second Mask. I used Chelle’s WSL_Mask 17. Merge your doodle and Mask layers together.
Merge your framed layers together.
With your top layer highlighted, paste your ribbon as a new layer and resize and place as desired. Give desired shadow.
Highlight your frame layers. Selections/All…. Float and then defloat. Highlight your ribbon layer and Selection/Invert. Hit your delete key.
Add embellishments as desired. I recolored one of the flowers and added the heart to it. Merged it down and duplicated it, for a 3 flower look.
Add your copyright information and merge all visible layers.
Save as PNG.

:::A Little Hello:::

:::A Little Hello:::
This tutorial was written by Aiya on May 31, 2008. Any similarity is purely coincidental.


Supplies
(1)Tube
PSP


My Choices
Suzanne Woolcott Element Pack from AMI.
PSP XI
Instructions
Open a 500x400 Image

The Envelope
Select two colors. (I selected the Black for my foreground and the darker Cream for my background from my tube. ) Using you Preset Shapes Tool create a rectangle in the bottom half of your image space. Convert this to a Raster Layer. (Layers/Convert to Raster)
Using your Preset tools (you may change your background color as I did to the darker red. But keep your original foreground color.) Draw a triangle the length of your envelope. Convert this layer to a Raster Layer. Resize as needed or desired using your pick tool with mode set to “Scale”. Duplicate your layer (Layers/Duplicate). Take the lower triangle layer and flip it (Image/Flip).
Resize this triangle with your Pick Tool, making it “shorter” until it looks right to you. Merge your triangles down to your rectangle layer. (Layers/Merge/Merge Down) (you will do this twice, once for each triangle.)

The Note
Select another background color preferably a lighter color than your envelope. Leave your foreground color as it is. Using your Preset Shapes Tool, create another rectangle much thinner than your envelope. Convert this layer to a Raster Layer (Layers/Convert to Raster).
Select a foreground color for your text . You can either make your foreground color transparent by pushing in the transparent button (3rd button underneath Foreground Color in your Materials Preview Palette.)
Go to your Text tool and select whatever Font you like ( I chose to use UpDock Size 18). Type out your text and click Apply. From here move your text box so that it lies inside your note. Convert this to a Raster Layer (Layers/Convert to Raster) You can add a shadow to your text by going to Effects/3dEffects/Drop Shadow. (My settings are Offset Vertical at 3, Offset Horizontal at 3, Opacity Attributes 63, Blur at 5.80, Shadow Color – Black). Recheck to make sure your text fits onto your note. You may have to undo and re-do until you get it just the way you want it.
Merge your text down to your Note layer (Layers/Merge/MergeDown)
You may leave your note as it is or rotate its position using your Pick Tool. If you have chosen to leave your note outside of the envelope go to the next step: “Adding your Tube”.
I have chosen to rotate my note and elevate it slightly so that all the words will show once I put my note “in” the envelope. This may take several attempts to perfect. Don’t get discouraged!
Once you have your note in position. Go to your envelope layer. Using your Selection Magic Wand Tool, highlight the lower “inside” triangle of your envelope. It should resemble little marching ants in a triangle. Now go to your note layer, then go to Selections/Invert. Using your Eraser tool, erase the lower part of your note.
Once this is done, merge your note layer to your envelope (Layers/Merge/Merge Down).

Adding Your Tube
Open your tube. Copy the layer or select it with your selection tool as the case may be. Now go to your Envelope layer. Paste your tube as a new layer (Edit/Paste As New Layer).
Resize your tube as desired using either your Pick Tool mode set at Scale or Image/Resize – Make sure if you use Image/Resize that the box “Resize all layers” is NOT checked.
Once you have your image resized and in the position, convert to a raster layer (Layers/Convert to Raster Layer)
You may now add a shadow as you did with your text (Effects/3D Effects/Drop Shadow)
Merge this layer down to your envelope (Layers/Merge/Merge Down).
If you wish to resize your image so you have a smaller size tag do so now by using Image/Resize – make sure your “Resize all layers” IS checked this time. I resized mine by 80%.

Adding Your Copyrights
Adding your copyrights is an absolute MUST! Even if you are only using FTU (Free to use) tubes and images. You still need to add the proper copyrights. If you are using PTU (Pay To Use) tubes you will also need to add your license number every time you use their work. As I am using Suzanne Woolcott I will also add her Safe URL. (Safe URL’s are websites that have no AC, Adult Content, on them).
Using your Text tool, select a font that will be clear to read even at a small size. I use “Oh la la” at 3-5 pts. Other good choices are Verdana and Tahoma. Type your copyright symbol by typing ALT-0169 (meaning you will type 0169 while holding the ALT key down). After you have your copyright symbol, type the artists name, Safe URL if they have one, and your license number. You may also add any personal inscription such as “Tag by Your Name” etc.
Place your credits as desired using your pick tool. I chose to place my credits on the right side of my tag by going to Image/Free Rotate. My settings were Direction-Right; Free Rotate – 90 degrees; Rotate Single Layer Around Canvas – Checked.
Once credits are in their place; convert your credits to raster layer (Layers/Convert to Raster Layer) and Merge All Visible. (Layers/Merge/Merge Visible). You may now save this image to use or as a snag for others to use in the future. Make sure to save as a PNG file.

Adding A Name
Add names as desired in the same manner as you added your copyrights. Make sure when you have each name typed, in place and merged that you “Save As”. This way you will not save over your original or another name you have made a tag for.

:::Train Ride:::


:::Train Ride:::


This tutorial was written by Aiya on May 28, 2008. It was written for those familiar with PSP and it's working. I use PSP XI. Any similarity is purely coincidental.

Supplies:
You will need (1) tube and image of choice, (3) Scrapbook papers, (1) Frame, (1-2) Faster Elements (1) Mask and your imagination.
I used:
Tube & Image - ©Vinegar at MyPSPTubes. You need a license to use her work. Get it HERE at MPT.
Scrap Kit – PTU “Thankful” by Designs by Krista at http://www.designsbykrista.net/.
Mask of Choice Chelle's WSL_16.
Font of Choice Popsies.

Instructions:
· Open a new 600 x 400 image.
· You may floodfill white if you wish. I, personally, do not.
· Paste your frame as a new layer. Resize as desired. I resized mine by 65% making sure the “Resize all layers” box is unchecked.
· Highlight the Floodfill Layer. Using your selection tool select a rectangle (or similar shape to the frame you are using) about the size of your frame.
· Paste your bottom paper as a new layer. Resize paper layer as needed or desired. Go to Selection/Invert - hit your Delete key.
· Click Select/Invert Again and then repeat for each layer of paper.
· Highlight the layer of paper directly below your frame. Paste Image as new layer. Adjust as necessary. Highlight layer of paper again – Selection/ Select All – Selection/Float – Selection/Defloat.
· Highlight your image layer and go to Selection/Invert – hit your delete key. Now adjust your image blend and opacity settings as desired. I set my blend mode to normal/Opacity 60. Merge this layer down to the paper layer below it.
· Highlight your frame layer and paste your tube as a new layer on top of it. Adjust as desired. Drop shadow as desired. I used (-2, -2; 63/5.80).
· Select the area inside your frame using your magic wand. And go to Selection/Modify/Expand by 1 or 2 pixels depending on the frame used.
· Highlight your tube layer and go to Selection/Invert and erase whatever bits you don’t want showing outside the frame. Then go to Selection/Select None.
· Now apply the same drop shadow settings to your frame and paper layers.
· Merge your frame and top paper layer together. Do not merge your tube down.
· From here take your remaining paper layers and place them as desired. You may skew or angle them. But make sure they are visible on one side or the other of the frame.
· Highlight your Frame Layer. And between your frame layer and your tube layer Add your Fastener bits as new layers. Resize and position accordingly. If you have multiple fastener layers you may merge them together. Do NOT give them shadow yet.
· Merge your frame and paper layers together. Then return to your fastener bits and where applicable select the hole punched space with your magic wand – Selection/Modify Expand by 1 or 2. Rreturn to your frame layer and hit your delete key. Repeat as necessary. Then go to Selection/Select None. Now you may give your fastener bits a drop shadow.
· You may now merge your Tube & fasteners to your Frame & Papers.
· Select two colors from your tube one as your foreground, one as your background. I chose two purples (one significantly lighter than the other). Floodfill your floodfill layer with one of these colors. Now take with the other color Airbrush here and there as desired. Apply mask of choice. I used WSL_Mask 16 by Chelle.
· Delete the Mask and ungroup layers. Adjust mask as desired. Merge all visible layers.
· Resize all layers as desired. I resized mine by 75%.
· Now add applicable copyrights and credits and save your base.
· You may now add desired text or name. I used font Popsies Size 24.

:::Ravens:::


:::Ravens:::
This tut was created May 28, 2008 by Aiya. Any similarities are purely coincidental.

Supplies:
Tube – Camilla Drakenborg from AMI. You need a license to use her work. Obtain one from AMI.
Scrap Kit – Onyx from Sophisticated Scraps by Lisa HERE – However any kit will suffice. Don’t be afraid to try it with other tubes and kits for your own unique look.
Mask & Font of Choice
(Papers 2, 6, & 4)

Instructions:
I suggest renaming each layer as it’s created just in case you get lost if you’re not very familiar with PSP.
1. Open a new 450 x 450 Image. You may floodfill white if you so desire.

2. Take your selection tool (Rectangle) select an area of space in the center making sure to leave plenty of space on either side. These will be your “frames”.

3. FRAME 1: Take your paper (I used the darkest one for my bottom layer - Paper 6) and Edit/Paste As New Layer. Resize if necessary making sure the “Resize All Layers” box is unchecked.

4. Go to Selection/Invert and then hit delete.

5. Selection/Invert again – then Selection/Modify/Contract by 30 Pixels and hit Delete.
6. Selection/Select All - Selection/Float- Selection/Defloat.

7. FRAME 2: For your second “frame” Repeat step #3 (I used Paper 4) then Selection/Invert and hit delete

8. FRAME 3: For your third “frame” hit Selection/Invert and Repeat Step #3 ( I used Paper 2). Then Selection/Select None

9. Highlight Layer FRAME 1 (Bottom Frame) - Image/Free Rotate – Settings should be Direction: Left; Degrees – Free:50; Rotate Single Layer Around Canvas – Checked.

10. Highlight Layer FRAME 2 - Image/Free Rotate – Settings should be Direction: Left; Degrees – Free:25; Rotate Single Layer Around Canvas – Checked.

11. Add a shadow to each of your Frame layers ( I used VO =(- 2), HO =(2), AO = (63), Blur = (5.8))

12. With your FRAME 2 Layer still highlighted Add a New Raster Layer (Layers/Add New Raster). With your selection tool select out a rectangle no larger or smaller than your Top Frame layer. Fill this space with a color from either your tube or your papers. (This will be your Colored Layer)

13. Paste your Tube (Edit- Paste As New Layer). – Image/Mirror, Resize as desired. I resized mine so that the face was very large. Highlight your Colored Layer and with your Magic wand click on the Colored area.

14. Highlight your Tube layer again and then Selection/Invert – Delete. Change your Blend Mode to Screen with an Opacity of 50. Merge down onto your Colored Layer.

15. Merge Frame layers down leaving the bottom (Floodfill) layer un-merged.

16. Take your Bead Embellishment. Paste as new layer. Place and resize as desired. Duplicate this layer twice. Taking one of the final three layers and Image/Flip and then Image/Mirror. Apply shadow and merge these three layers together.

17. Highlight your floodfill layer Selections/Select all. Highlight your Bead layer – Selection/Invert – Delete

18. Now take your erase tool and erase whatever bits left you desire so that it appears the beads are wrapped around your frame.

19. Take flood fill layer and fill with color of choice. Apply your Mask Layer. I used WSL – Mask 38. Delete Mask and Ungroup Layers.

20. Add Tube as New Layer (Edit/Paste As New Layer) Add shadow.

21. Add Copyrights and Credits. Merge All Visible. Save as PNG file if you want to save your Base. From here add any text desired!