:::Train Ride:::
This tutorial was written by Aiya on May 28, 2008. It was written for those familiar with PSP and it's working. I use PSP XI. Any similarity is purely coincidental.
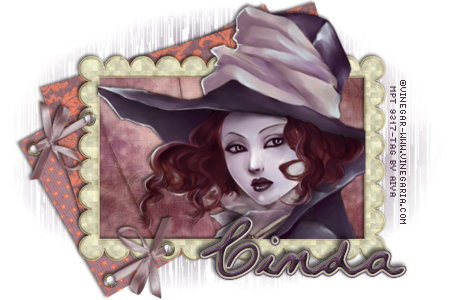
Supplies:
You will need (1) tube and image of choice, (3) Scrapbook papers, (1) Frame, (1-2) Faster Elements (1) Mask and your imagination.
I used:
Tube & Image - ©Vinegar at MyPSPTubes. You need a license to use her work. Get it HERE at MPT.
Scrap Kit – PTU “Thankful” by Designs by Krista at http://www.designsbykrista.net/.
Mask of Choice Chelle's WSL_16.
Font of Choice Popsies.
Instructions:
· Open a new 600 x 400 image.
· You may floodfill white if you wish. I, personally, do not.
· Paste your frame as a new layer. Resize as desired. I resized mine by 65% making sure the “Resize all layers” box is unchecked.
· Highlight the Floodfill Layer. Using your selection tool select a rectangle (or similar shape to the frame you are using) about the size of your frame.
· Paste your bottom paper as a new layer. Resize paper layer as needed or desired. Go to Selection/Invert - hit your Delete key.
· Click Select/Invert Again and then repeat for each layer of paper.
· Highlight the layer of paper directly below your frame. Paste Image as new layer. Adjust as necessary. Highlight layer of paper again – Selection/ Select All – Selection/Float – Selection/Defloat.
· Highlight your image layer and go to Selection/Invert – hit your delete key. Now adjust your image blend and opacity settings as desired. I set my blend mode to normal/Opacity 60. Merge this layer down to the paper layer below it.
· Highlight your frame layer and paste your tube as a new layer on top of it. Adjust as desired. Drop shadow as desired. I used (-2, -2; 63/5.80).
· Select the area inside your frame using your magic wand. And go to Selection/Modify/Expand by 1 or 2 pixels depending on the frame used.
· Highlight your tube layer and go to Selection/Invert and erase whatever bits you don’t want showing outside the frame. Then go to Selection/Select None.
· Now apply the same drop shadow settings to your frame and paper layers.
· Merge your frame and top paper layer together. Do not merge your tube down.
· From here take your remaining paper layers and place them as desired. You may skew or angle them. But make sure they are visible on one side or the other of the frame.
· Highlight your Frame Layer. And between your frame layer and your tube layer Add your Fastener bits as new layers. Resize and position accordingly. If you have multiple fastener layers you may merge them together. Do NOT give them shadow yet.
· Merge your frame and paper layers together. Then return to your fastener bits and where applicable select the hole punched space with your magic wand – Selection/Modify Expand by 1 or 2. Rreturn to your frame layer and hit your delete key. Repeat as necessary. Then go to Selection/Select None. Now you may give your fastener bits a drop shadow.
· You may now merge your Tube & fasteners to your Frame & Papers.
· Select two colors from your tube one as your foreground, one as your background. I chose two purples (one significantly lighter than the other). Floodfill your floodfill layer with one of these colors. Now take with the other color Airbrush here and there as desired. Apply mask of choice. I used WSL_Mask 16 by Chelle.
· Delete the Mask and ungroup layers. Adjust mask as desired. Merge all visible layers.
· Resize all layers as desired. I resized mine by 75%.
· Now add applicable copyrights and credits and save your base.
· You may now add desired text or name. I used font Popsies Size 24.
No comments:
Post a Comment